Manage Trial Requests
As a Partner, you can offer your customers a convenient way to request trials for Cisco Secure products by providing a specific link to the Create Trial Request form. This link can be integrated into your website or sent directly to customers. Any trial requests submitted through this link are automatically associated with your organization.
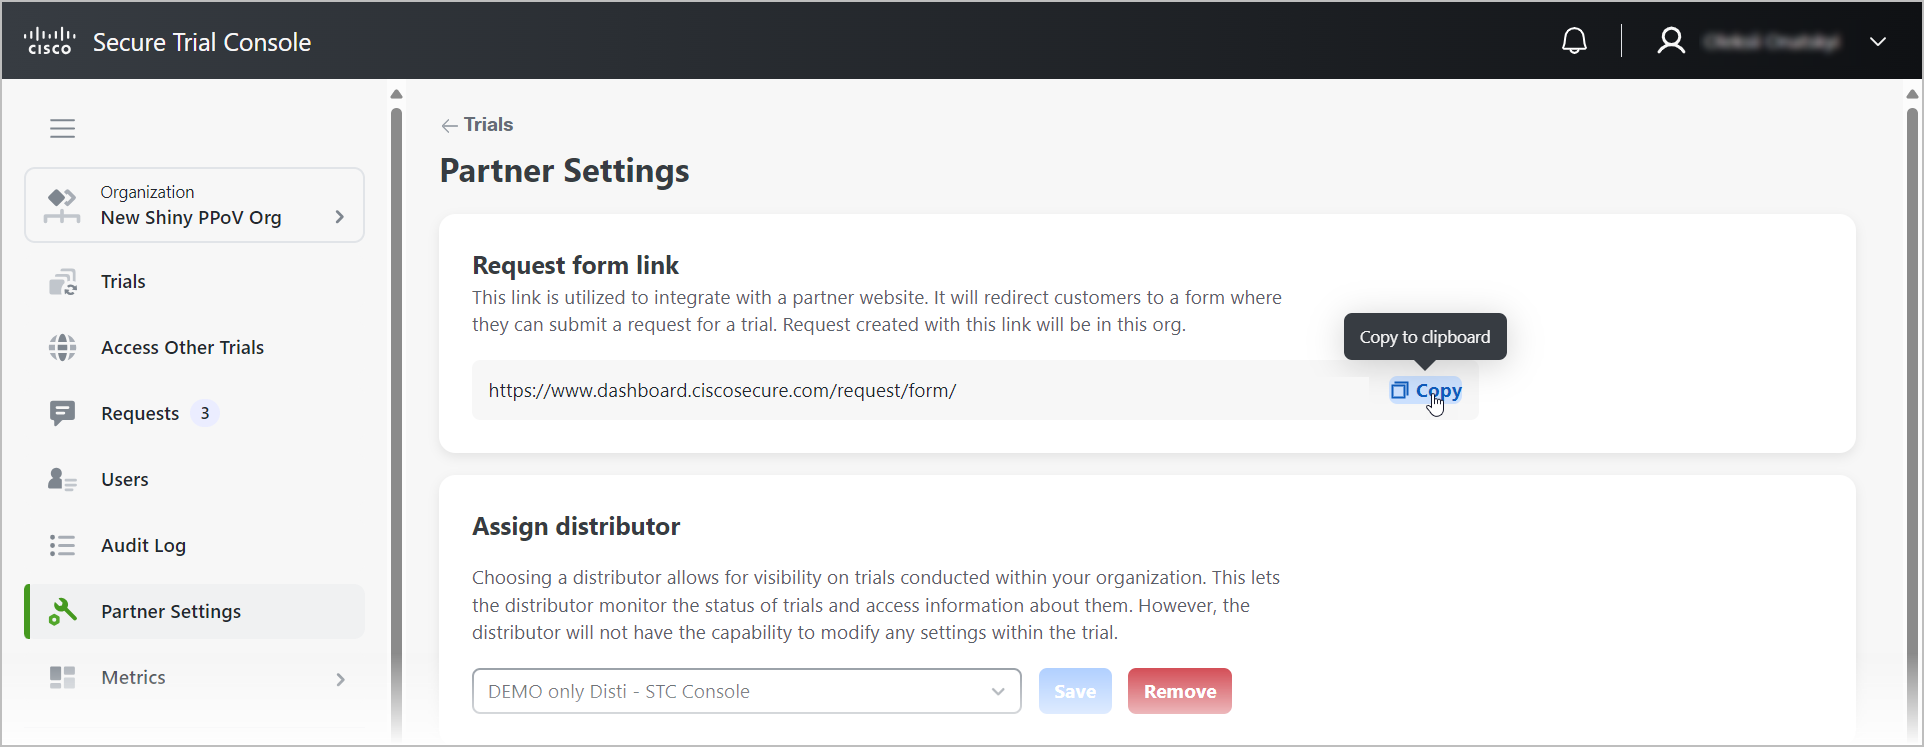
You can find the link in the Partner Settings tab under the Request form link section.
Note | This feature is available only to parent organizations, such as partners and distributors. |
You activate trial requests through the Requests tab but remember that starting and managing a trial involves more than just selecting the Begin trial button. For the complete trial workflow, see Understand the Secure Trials Workflow.
Starting a new trial allows you to provide a potential customer with free access to Cisco security products for 30 days, giving them the opportunity to "test drive" the product.
Note | For Umbrella and Secure Endpoint, this functions slightly differently:
|
Note | At any time, including after a trial has expired, you can extend a trial. Trials can be extended only once for 14 days. |
The flow
Let's go over the process in detail.
-
You, as a Partner, go to share a link to the Partner Settings tab > the Request form link section, copy the link, and share it with a customer in any convenient way.
-
The customer follows the link, opens the form, fills it out, and then submits the form.
NoteThe customer's email address is crucial for receiving a validation code to confirm their identity and proceed with the trial request. Please remind them to double-check the accuracy of the email address provided.
-
To initiate the trial request process, the system prompts the customer to enter the validation code received via email. If the code is entered incorrectly, the Resend button allows the user to request a new code, up to three times consecutively. After three failed attempts, the Resend button will become inactive for 15 minutes.
Upon successfully submitting the form, the customer receives a confirmation email containing a unique request ID.
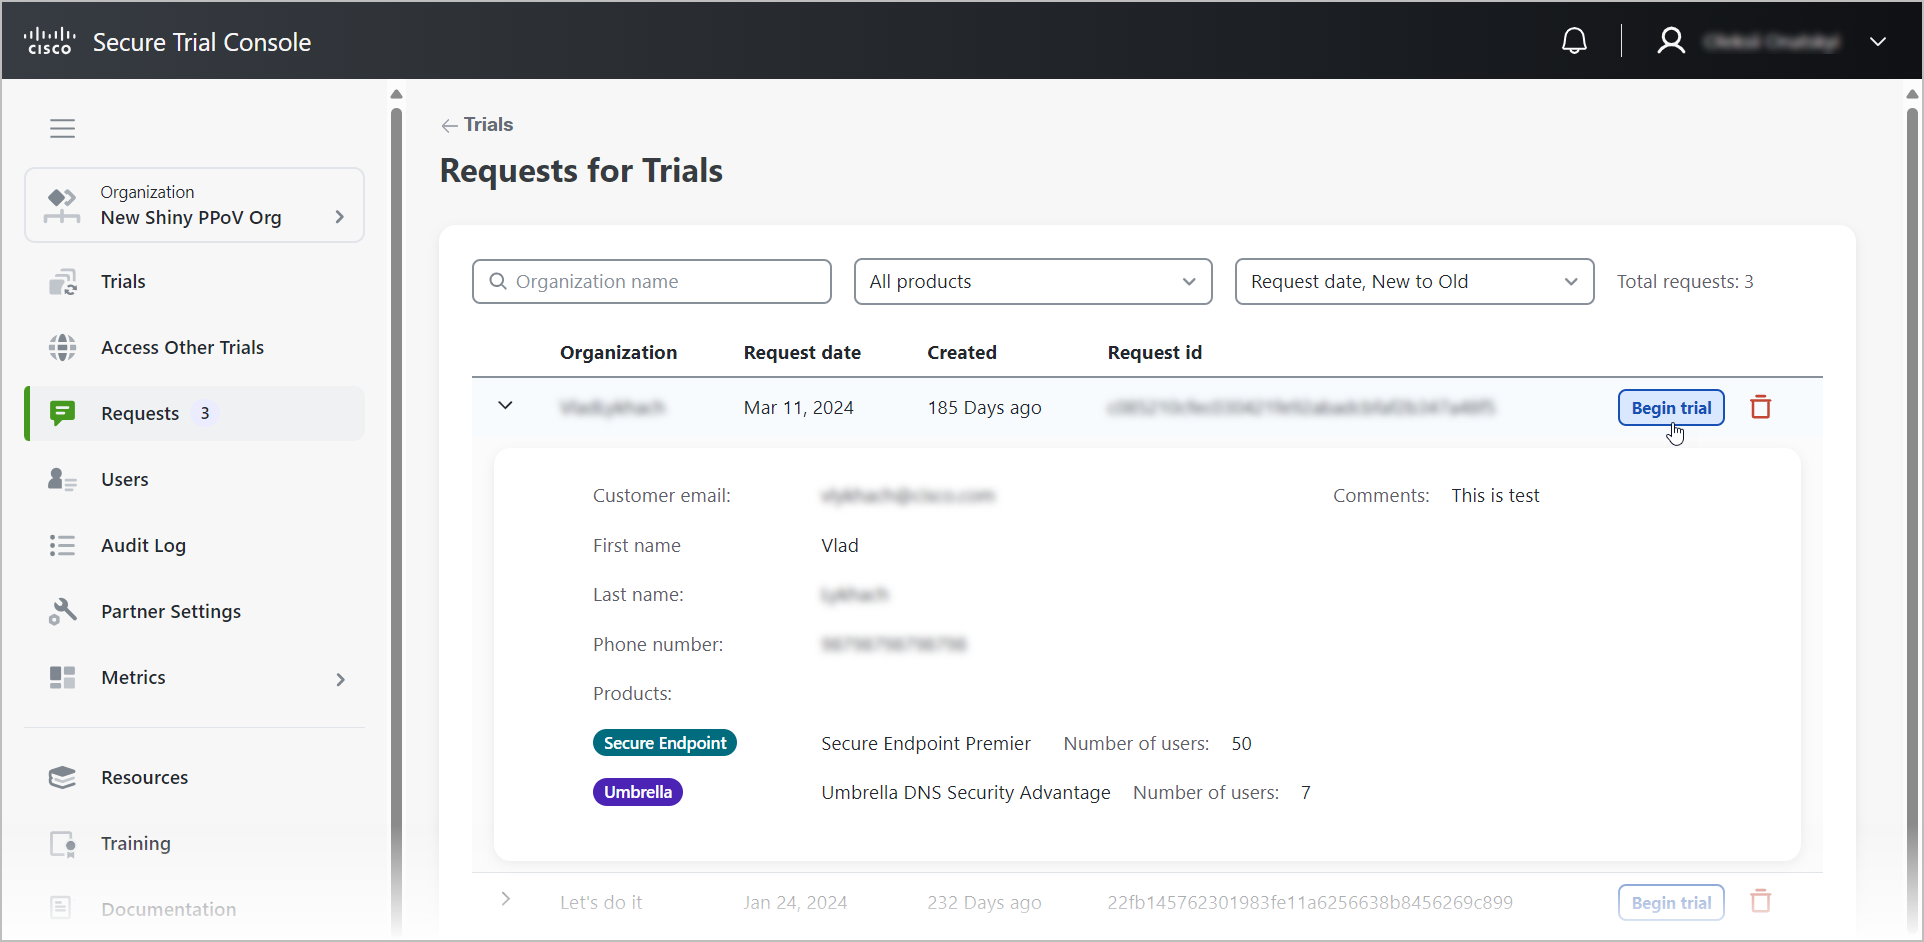
Once submitted, all trial requests become accessible and visible on the Requests tab. A notification beside the tab name will promptly inform you of any new requests.
-
At this point, you need to review the trial request carefully and confirm with your customer on the type of package to trial. Navigate to Requests, search and select a trial request, then select Begin trial.
-
Follow the procedure described in Start a New Trial. Certain fields of the trial creation form will be automatically populated with information provided by the customer in the request.
Upon successful activation of a trial, the corresponding trial request is automatically removed from the list in the Requests tab, ensuring a streamlined and clutter-free interface.
Look through the trial requests
Manage your work with the requests by applying sorting and filtering parameters.